Monday, February 25, 2019

New/Underused Product Part 1

Linden Leaf is hosting some different LTC swaps this year.  She posted them last year giving us plenty of time to learn, play, and work on our cards.  For the swap you are supposed to pick a new or underused product and use that in different ways to make four sets of cards.  I picked the Gelli Plate.  I have 2 Gelli Plates and I have used them a few times but I thought I was not using it to its fullest.

The swap was posted in September with the due date in February.  I took advantage of a Saturday in November with nothing going on and made my cards for the first two swaps.  I saw this technique on Instagram and loved it immediately.  Here is the You Tube video if you want to watch.

It is pretty easy but I'll walk you thru it.  You put a little paint on the Gelli Plate.  I think in the past I used more paint than necessary.  In many of the videos you see them rolling extra paint off on a scrap piece of paper.  You want to use one tone of paint in the first layer and a different tone in the second layer.  For example, you don't want black in one corner and yellow in another corner.  I hope that makes sense :D

After you have the plate covered with paint, you lay down a big stencil and pull a print.  LEAVE the stencil down.  I made the mistake of taking the stencil off the first time, oops.  Leave the stencil down.  If there is extra paint in the open areas you can wipe them off with a baby wipe/damp paper towel.

While the stencil is still down, take a contrasting shade of paints and apply them with a sponge.  My first layer was light colored so I used dark colors for this next layer.  In the next part of the video, she takes a rubber stamp, put paint on it, and stamps it on the Gelli Plate/stencil to add texture.  I did this too but you can't see it on my cards.  I would probably skip this step next time.

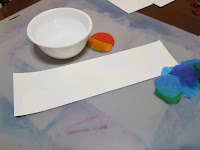
Finally, you pull the stencil off.  I was really nervous about this next part.  You let the Gelli Plate dry and apply a thin layer of white acrylic paint. (I forgot to take a pic of this part.) I loved what I saw on the plate and I was worried that covering it with the white paint would ruin it.  But it did not :)  Now you get to pull your awesome print!  I love how they turned out.

I had to do this three times to make the number of cards I wanted.  The first time, I printed on plain white card stock.  The second time, I printed on text paper from an old book.  And the last time, I took a brown paper lunch bag, opened it up, and printed on that.

Linden Leaf said we could reuse old stamps or use the same stamp for each of these swaps.  I carved the finger print heart and I will use it for all of these swaps.  As you can see, I stamped it in pink on white paper, cut it out, and attached it with a 3-D glue dot.  Then I glued the whole thing to pink scrapbook paper.

New/Underused Product: Gelli Prints-Stencils
One of the things I discovered in this process it that the paint does matter. :P  I always bought cheap acrylic paint and I noticed that it is not glossy.  The more I work with the plate, the more I want a glossy finish.  As I buy new paints, I will defiantly look for nicer quality or a high gloss paint.

Thanks Linden Leaf for hosting these swaps :)


Saturday, February 2, 2019

Winter LTC Swap

 I am participating in another one of aMAZEing adventure frog's LTC swaps.  This one is called "Winter Craft & Swap" and my card is called "Joy to the World."  When I first signed up, I planned to make a card with a snowman on it.  But after a while I realized that I hadn't made any Christmas themed cards in 2018.  So I changed my plans.

This card is basically the same as my Heart Art card.  I took strips of old text paper that I bought on Etsy (dictionary, encyclopedia, music, etc), spread a thin layer of glue on watercolor paper using an old gift card, both over and under the papers, and let it dry.  Then, I spread Gesso with a gift card and let it dry.  Next, I took an old sock and rubbed Ground Espresso & Rusty Hinge Distress Inks.
Finished card, card before extra ink,
card before crackle (L-R)

When I was done with that, I cut the cards to size, stamped my stamp, brushed Tim Holtz Distress Crackle Paint-Clear Rock Candy on top, and let that dry.  Last time I used this technique, I wasn't happy with the crackle effect.  This go round, I was disappointed that the Distress Ink background really smeared when brushing the crackle paint on.  I tried using my heat tool on some of the cards before adding the crackle and the problem didn't stop.  So in the end, I went back and added extra Distress Ink on top of the crackle.

I punched the corners of the cards before adding the crackle.  I glued the whole thing to brown paper.  I struggled to come up with a name for the card.  I wanted to use a Christmas Carol but I have already made a card called "Mary Did You Know".  I thought about calling it Madonna something but that didn't feel right.  I was listening to Christmas music and Joy to the World jumped out at me.  I love how they turned out.  I know it is February but I made the cards in late November <3


Friday, February 1, 2019

My First Coin

Beetle has started hosting Letterbox Trading Coin swaps.  Instead of 2.5 x 3.5 cards you make a 2.5" circle coin.  The first one she hosted had a cow theme.  I passed on that one but joined her next one about birds.  She called the swap, "LTCoins: BIRDS!" 

Like most of my cards, I carved the stamp right away.  I knew that I wanted to use Distress Inks/Oxides.  I rubbed the inks/oxides on my mat, sprayed with water, tapped/rubbed the card stock thru the ink, dried the paper, and put it in the ink again.  I was quite happy with how they turned out.

Then came cutting a million circles.  A few years ago my mom got me this scrapbook thing that makes cutting circles easy.  My mom is a big scrapbooker and I asked if she had an easy way to make circles for round logbooks.  She had one of these and let me borrow it.  After I borrowed it a few times she got me one for Christmas.

My coins are called, "Owl With Attitude."  The coin has 3 layers, I made 20 coins, for a grand total of 60 circles!  I glued all the layers together with a glue stick.

My original idea for the card was to stamp the owl on white card stock and color it in with Distress Markers.  But I liked the background so much that I didn't want to cover it with the owls.  It was supposed to be brown circle, distress circle, and colored owl on top.  When I switched to Plan B, I couldn't decide what background color to use.  The coins with a lot of blue got orange circles and the ones with a lot of orange got blue circles.  I really like how they turned out :)

Thursday, January 31, 2019

Pirate LTCs

My inspiration 
Back in August someone posted a pirate postal tracker.  I was excited about the theme but I just don't have the patience waiting for postals to come around.  So, I hosted a pirate LTC swap.

My first idea was to carve an octopus pirate.  But as I was looking at images, I found a Life is Good pirate.  If you know me, I love carving Life is Good images.

Regular tissue paper
I had my stamp image but I needed a background.  In the description of the swap I encourage participants to try something new.  I couldn't use my standard alcohol inks.  I work in a day care and everyday I walk past a framed piece of art that was my inspiration.

Just by looking at the art at work, I thought you cut up tissue paper, "paint" water on your paper, lay down the tissue paper, and let it dry.  As you can see above, that doesn't work.  I got on Pinterest to see what I did wrong.  Apparently, you have to use bleeding tissue paper.  Who knew?
Bleeding tissue paper

I ordered some online, cut it with the hexagon punch, and "paint" the water under and over the tissue paper.  Then you let it sit a bit, peal the paper off, and let it dry.  It was basically love at first sight.  I was a little disappointed with the white spots but I got over it right away when I started stamping my image.

Seas The Day LTCs
Originally, I was going to stamp and emboss my image with brown, because blue and brown go well together.  But then I got to thinking that since it was pirate theme I should emboss in black.

I am very happy with how these cards turned out.  I already plan to use this technique again.  You will actually see that post before you see this one :P


Friday, January 11, 2019

Happy New Year!

The Princess and I spent the first day of 2019 letterboxing and geocaching.  On New Years Day we planted four boxes, one of them being our Secret Santa stamp.  We also looked for local GeoArt.  They were hybrid boxes planted by geocachers.  The art made a Batman symbol.  We got 26 the first day and I went out after the other 30 on the first Saturday of the year.  Of the 56 hybrid boxes only ten of them still had their stamps :(

Planting on 1/1/19
Also on that first Saturday, I went after some traditional letterboxes.  Two of them were planted on New Years Day.  When I was finished with the two new boxes and the 30 hybrids, I went after 5 boxes planted at Scales Lake by people attending the GLG.  Someone recently planted another box at Scales Lake.  I looked for it and couldn't find it.  I think I finally have found/looked for all the boxes at Scales Lake. 

At the end of year, I usually do a recap post.  My traditional plants in 2018 were pretty average.  If you don't count the boxes I planted for my event in 2016, the last 3 years I have planted 28 boxes each year.  Funny how that worked out.  My find count for 2018 was average.  My LTC plants and finds were down in 2018.  I started working in September 2017 and I have less time to make LTCs now.

I don't set boxing goals.  I am looking forward to the Big Top on the Prairie event in Ohio.  I have already set money aside for the hotel room.  I also plan on attending an event at a nearby state park in May.  It will be hosted by the same boxers who put on the GLG last year.  My boxing buddy says we need to go box in Louisville.  That will help add some stamps to my logbook :)

As for planting boxes, I have a plan for 2019.  Last year I joined a LTC swap for silly holidays.  When I joined I made a card for a silly holiday on my birthday thinking I would hide it on my special day.  I then I got to thinking it would be fun to hide more silly holidays.  I plan to hide one silly holiday each month in 2019.

There has been talk on the AQ boards of a Power Plant Challenge.  If you plant at least ten permanent traditional boxes between Nov 1st and April 30th, you get a Power Plant Patch <3  If everything goes as planned, I will have 20 boxes planted by the end of April :)

I hope everyone has a safe, happy, and healthy new year :)

Tuesday, January 1, 2019

Thanksgiving LTC

ThanksgivING: Track #1 Amazing Grace
This is my card for Team Awesome Pants's "ThanksgivING" LTC swap.  It is called, "Track #1."

For the swap, TAP made a Praise and Worship CD.  When you sign up, you send her a number and she sends you the name of that track.  You make a card to go along with the song you get.  At the end of the swap you get a copy of the CD and all the LTCs.  This is my third time to participate in one of these swaps. 

The first two times I got songs I didn't know.  This third go around I got lucky; I got Amazing Grace.  I joined the swap about 2 weeks before it started and I thought making my card would be easy.  I looked online for some pretty Amazing Grace calligraphy and was over whelmed with so many choices.  I finally picked one and carved my stamp.

For the background, I really liked the look of my stamp on the wood plank paper in the bottom right of the photo but I only had enough of it to make a few cards.  I started looking for other wood paper but the other one that I liked was kind of dark.  I decided to lighten it up by stamping my stamp on vellum.  I like how they turned out and I am sending the stamp off to TAP to plant.

Sometimes I make quisps that go with the themes of my cards and send them along in the card sleeves.  This time I carved a cross made from 3 nails.  I stamped it on old hymn paper and embossed it with gold embossing powder.


Friday, December 28, 2018

Christmas Cookies LTC

Holiday Cookie Exchange II:
Christmas Monster Cookie
I am in Sheep Thrills LTC swap, "Holiday Cookie Exchange II".  My recipe is for Christmas Monster Cookies and we make them every year.

I typed my recipe, printed them on regular paper, and cut them to size.  I stamped my stamps on card stock, attached them with a tape runner, but added the Christmas cookie washi tape to spruce them up.

I carved the stamps for a traditional series in 2015 and retired earlier this year (2018).  A few years ago someone started sending out LTCs of ingredients.  Once you got all the ingredients you were supposed to guess what it was and the winner got a prize.  Something happened and the person stopped sending out the cards.  I thought it was a great idea and planted a traditional series like it.

For my series I made 12 stamps.  There were 8 ingredients, a timer, the thing you were making, something to wash it down, and a friend to share with.  The recipe was for chocolate chip cookies and I planted the series on National Chocolate Chip Cookie Day.

A few months ago I got reports that some of the stamps were missing.  When I went to retire the boxes I could only find half of them.  I was surprised at how much some of the woods had grown since I was last there.  I would like to go back this winter and look for some of them again.

HERE is the recipe for the cookies.  I print recipes off Pinterest and put them in a binder.  When I went looking for this one I discovered that I had printed it off twice, oops.  I hope the people receiving the recipe enjoy the Christmas Monster Cookies as much as I do :)